Graham Efurhievwe
Oct 21st, 2022One basic tenet of editing is being able to change aspect ratio and resolution at will. With the rise of social media and screens of different kinds, videos and images have come to be represented in different ways.
As these dimensions change, it is important for creators to know how to work their way around them. Many filmmakers and editors use Adobe Premiere Pro. Learning how to change aspect ratio in Premiere Pro is important to these users.
Ideally, the properties of your image (frame size or resolution and frame shape or aspect ratio) should be determined before you start work on any project. This is because they are essential and determine the final outcome of your work.
Resolution and aspect ratio are intimately related features but are ultimately different things. To learn more about aspect ratio and resolution, see what is aspect ratio?
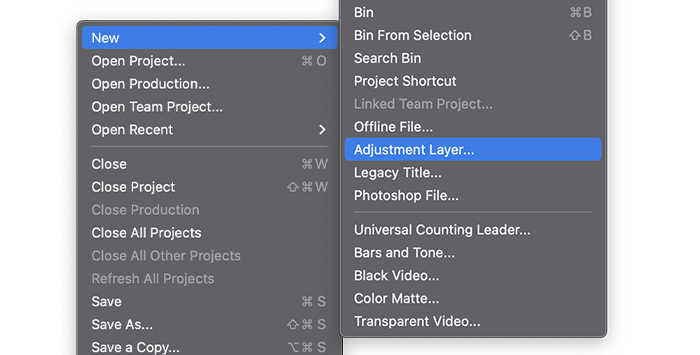
There are two main ways to change aspect ratios in Premiere Pro. One for a brand new sequence and one for a sequence you are already editing.
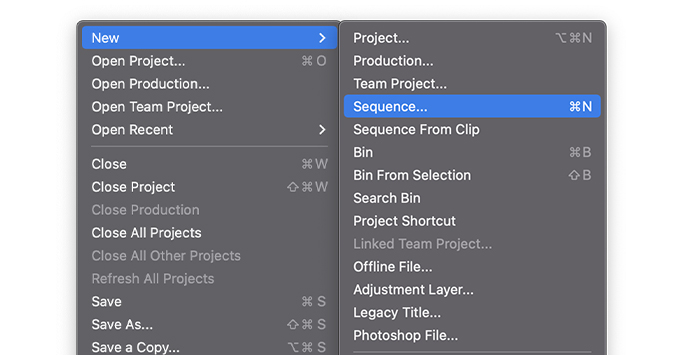
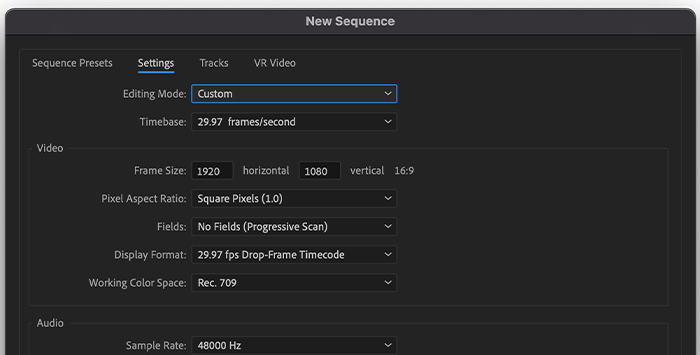
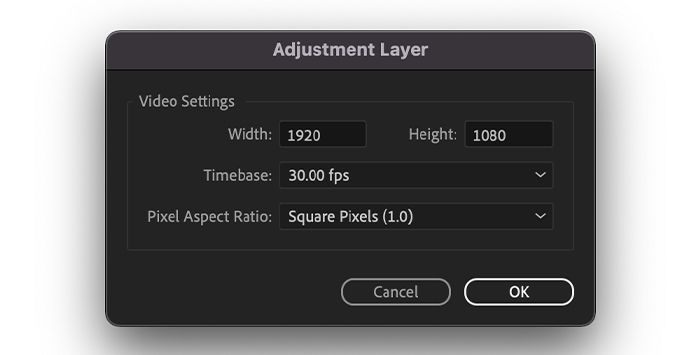
By now, your target aspect ratio for your new sequence will have been set.

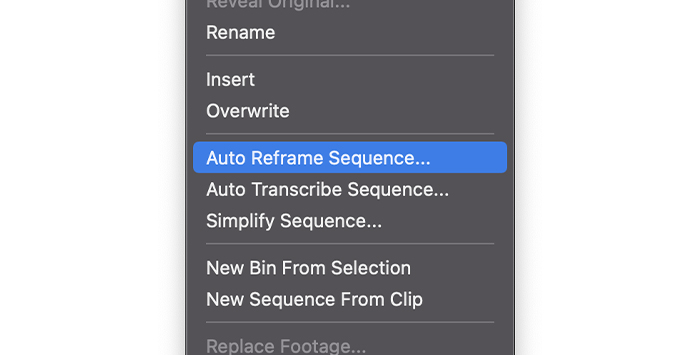
If you’re in the middle of editing, you can also use the Premiere Pro feature called “Auto Reframe Sequence” which offers different preset aspect ratios to choose from.
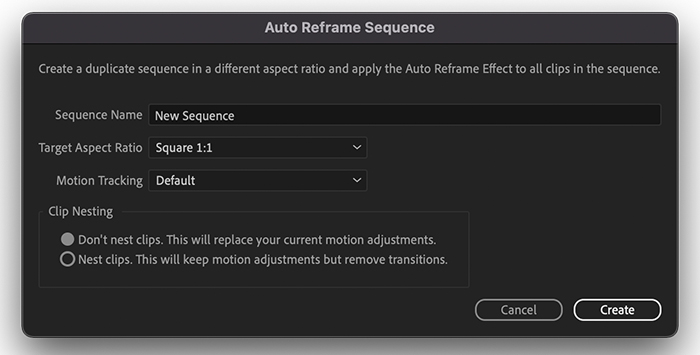
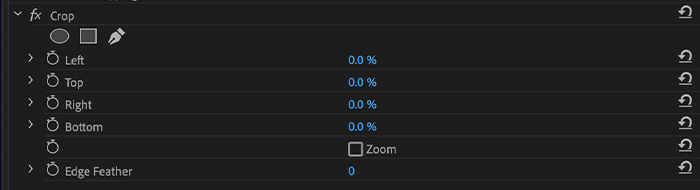
Premiere Pro should automatically analyze and create a mirror sequence with your new aspect ratio. Premiere Pro does well to keep the main subject of your footage in the frame, but it is prudent to go through the clips to be sure they have the correct aspect ratio.
You can do this and adjust the frame parameters using the “Motion” tab on the “Effects Controls” panel.
|
|
Aspect Ratio | Aspect Ratio | Width | Height |
|
Old TV Look |
4:3 |
1.33:1 |
1920 |
1443 |
|
Widescreen 1080p |
16:9 |
1.78:1 |
1920 |
1080 |
|
Widescreen 4K UHD |
16:9 |
1.78:1 |
3840 |
2160 |
|
Widescreen 8K UHD |
16:9 |
1.78:1 |
7680 |
4320 |
|
35mm Motion Picture Standard Hollywood Movies for 4K UHD |
1.85:1 |
3840 |
2075 |
|
|
Widescreen Cinema Standard Hollywood Movies for 4K UHD |
2.35:1 |
3840 |
1634 |
|
|
IMAX for 4K UHD |
1.43:1 |
3840 |
2685 |
|
|
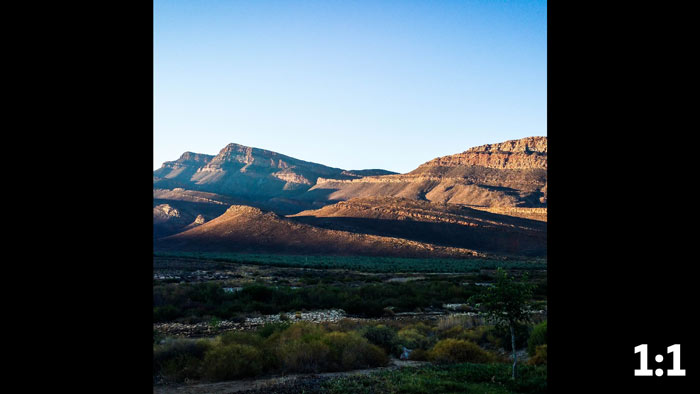
Square |
1:1 |
1:1 |
1080 |
1080 |
|
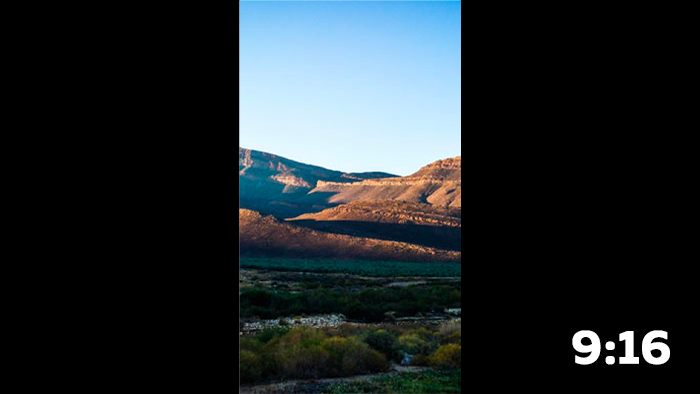
YouTube Shorts, Instagram Stories, Vertical Videos |
9:16 |
0.56:1 |
1080 |
1920 |
Source: Wikipedia
When editing, if you import clips with a different aspect ratio into a project that uses another aspect ratio, a clip mismatch warning will pop up. You can click on “Keep existing settings” to stick to the original aspect ratio or you can effectively decide how to reconcile both of the conflicting aspect ratios.
If you stick to the original settings, the video will either be zoomed in or out to accommodate the footage and fill out the screen. In reconciling the conflicting aspect ratios, you can do that by using techniques such as letterboxing and pan and scan.
Letterboxing and pillarboxing are tricks employed by video makers to keep a video’s initial aspect ratio when it has to be displayed on a screen with a different or wrong aspect ratio. It is also used for the adaptability of movies with multiple aspect ratios.
Different media forms and screens have different video recording standards, so a mismatch is bound to happen. When it does, black bars appear to fill out the spaces. “Letterboxing” refers to the horizontal black bars at the top and bottom of the screen.
They appear when the content has a wider aspect ratio than the screen. “Pillarboxing” refers to black bars on the sides of the screen. This occurs when the filmed content has a taller aspect ratio than the screen.
Pan and scan is a different method of reconciling clips of a certain aspect ratio and a project with a different one. In this method, all of your footage is not preserved like with letterboxing. Here only a part of your frame, presumably the most important, is preserved. The rest is discarded.
It is like imposing a vertical 16:9 film on a 4:3 screen. The horizontal part of the 16:9 frame that superimposes with the 4:3 frame is preserved alongside the important action, leaving out the “unimportant” parts.
If you use Premiere Pro, you may have come across frame and pixel aspect ratios. There is an aspect ratio for the frames of both still and moving pictures. There is also a pixel aspect ratio for each of the pixels in those frames (sometimes referred to as PAR).
Different aspect ratios are used with various video recording standards. For instance, you can choose between recording videos for television in a 4:3 or 16:9 frame aspect ratio.
You choose the frame and pixel aspect when you create a project in Premiere Pro. You cannot alter these values for that project once they have been set. A sequence’s aspect ratio, however, is modifiable. Additionally, you can incorporate assets made with various aspect ratios into the project.
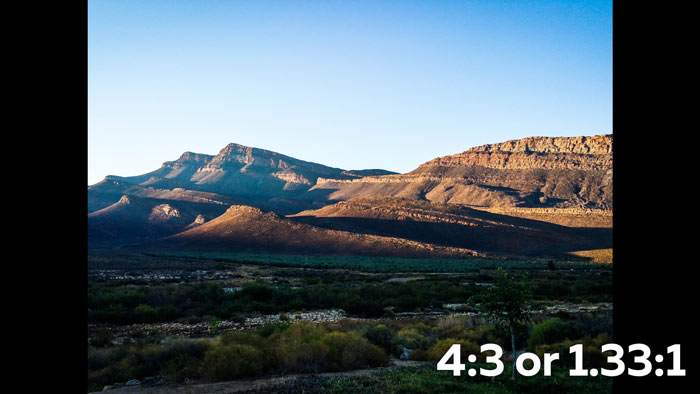
The ratio of an image’s width to height is referred to as the frame aspect ratio. For instance, the frame aspect ratio for DV NTSC is 4:3. (or 4.0 width by 3.0 height).
The frame aspect ratio of a standard widescreen frame is 16:9. The 16:9 aspect ratio can be used while recording on several cameras that include a widescreen option.
Utilizing motion effect settings like Position and Scale, you can apply the letterboxing or pan and scan techniques in Premiere Pro and use those to change the aspect ratio of a video.


The width-to-height ratio of a single pixel in a frame is known as the pixel aspect ratio. There is a pixel aspect ratio for each of the pixels in a frame. Because different television systems make different assumptions about how many pixels are needed to fill a frame, pixel aspect ratios vary.
For instance, a 4:3 aspect ratio frame is defined by several computer video standards as being 640×480 pixels high, resulting in square pixels. The aspect ratio of computer video pixels is 1:1. (square).
A 4:3 aspect ratio frame is defined by video standards like DV NTSC as 720×480 pixels, resulting in more angular, rectangular pixels.
To change your pixel aspect ratio, go to your Pixel Aspect Ratio section, choose an aspect ratio from the dropdown list and then click OK.
| Pixel aspect ratio | When to use | |
| Square pixels | 1.0 | Footage has a 640×480 or 648×486 frame size, is 1920×1080 HD (not HDV or DVCPRO HD), is 1280×720 HD or HDV, or was exported from an application that doesn’t support nonsquare pixels. This setting can also be appropriate for footage that was transferred from film or for customized projects. |
| D1/DV NTSC | 0.91 | Footage has a 720×486 or 720×480 frame size, and the desired result is a 4:3 frame aspect ratio. This setting can also be appropriate for footage that was exported from an application that works with nonsquare pixels, such as a 3D animation application. |
| D1/DV NTSC Widescreen | 1.21 | Footage has a 720×486 or 720×480 frame size, and the desired result is a 16:9 frame aspect ratio. |
| D1/DV PAL | 1.09 | Footage has a 720×576 frame size, and the desired result is a 4:3 frame aspect ratio. |
| D1/DV PAL Widescreen | 1.46 | Footage has a 720×576 frame size, and the desired result is a 16:9 frame aspect ratio. |
| Anamorphic 2:1 | 2.0 | Footage was shot using an anamorphic film lens, or it was anamorphically transferred from a film frame with a 2:1 aspect ratio. |
| HDV 1080/DVCPRO HD 720, HD Anamorphic 1080 | 1.33 | Footage has a 1440×1080 or 960×720 frame size, and the desired result is a 16:9 frame aspect ratio. |
| DVCPRO HD 1080 | 1.5 | Footage has a 1280×1080 frame size, and the desired result is a 16:9 frame aspect ratio. |
Source: Adobe
As a beginner video editor or an experienced one, knowing how to change aspect ratio at will is a useful skill. Premiere Pro is one of the leading video editing software available to prosumers but may be a bit difficult to work around if you’re not used to it.
If you’re having any problems with different aspect ratios, either for a new sequence or an existing one, this guide should help you figure out how to mitigate them and simplify your process with minimal hassle.


