Marco Sebastiano Alessi
Mar 01st, 2022Do you have the feeling that everyone these days is starting a podcast? Well, you’re right! The podcast market is bigger than ever, and it keeps growing worldwide. Over the last three years, the number of podcasts went from five hundred thousand to over two million.
As on-demand audio increases in popularity, so does the number of people listening to podcasts. In 2021, there were 120 million podcast listeners in just the United States, with industry experts predicting there will be over 160 million podcast listeners by 2023.
Both individuals and enterprises use audio content to reach a broader audience and have their voices heard. Thanks to the affordability of the best podcast equipment and the accessibility of information, you’ll find podcasts for every niche, run by professionals and amateurs alike. Topics can range from astrophysics and cooking to finance and philosophy.
Businesses have found a way to promote their products and expand their audience using podcasts. Furthermore, podcasts are also a fantastic tool to keep in touch with the existing audience, interact with clients, and promote suppliers.
Today, the technological skills required to start a podcast are minimal, and so is the budget necessary to kickstart a new show. However, with such a low barrier to entry, the competition to attract the listener’s attention is more challenging than it used to be.
With this article, we’ll answer the question: what equipment do you need to start a podcast. Namely the tools and the right podcast equipment that allow you to record a professional episode and make it available to your online audience. By the end of this post, you’ll know everything you need to start your new show. All you’ll need to do is to come up with an excellent idea for your podcast!
If you find a podcast that ended after just a couple of episodes, that’s published at irregular intervals, or that doesn’t have a defined intro, outro, or length, you have likely come across the podcast of someone who didn’t think things through before they hit the ground running.
Planning things in advance is a crucial aspect of your podcasting career and one you should focus on before doing anything else. If you’re planning to start your own podcast, you need to make sure you have a clear understanding of what you’re trying to achieve with it, your target audience, and if you have the time to keep up with it for as long as necessary.
Here are the questions you must ask yourself:
Once you have an answer to all these questions, you’ll be able to plan long-term and create a potentially successful podcast.
Perhaps there’s an even more crucial question you have to ask yourself before sketching out your show, which is: what kind of podcasts do I like? It may seem trivial, but if you generally listen to podcasts between 30 to 45 minutes long, I suggest starting a podcast of roughly this length. There are many successful podcasts that are 60, 90, even 120 minutes long. Will you be able to keep your audience engaged for the entire duration of the show?
You should avoid two critical things at all costs: changing the format of your podcast mid-season and having your audience skip through your show or listen only to a part of it. The latter, especially, has a very negative impact on your stats. Having the audience skip through will “convince” the algorithm of the streaming service that your podcast is not particularly good. When the algorithm decides your show is not worth promoting, rest assured you’ll have a hard time reaching new listeners and maximizing your network.
We must mention competition. If you’re planning to start a podcast about a specific niche, you must first identify which podcasters are already covering the subject. Make sure you create something which would attract their audience while also offering something more or something different.
Start by making a list of your future competitors (because this is what they are, though you may end up collaborating with some of them in the future). Highlight what you like about their shows and what you think you could do better than them.
Your podcast should be a combination of your personality and expertise, adjusted according to the existing offer already in the market. Does it sound too entrepreneurial? The thing is, if you want your show to be successful, you’ll have to take the market into account and make decisions accordingly, and I suggest you do it before you start recording your first show.
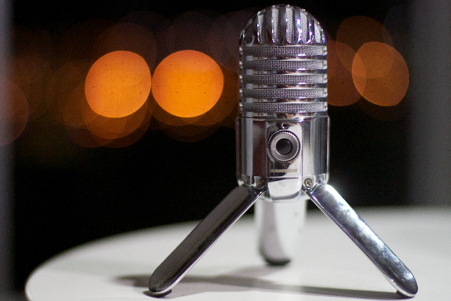
The single most important piece of audio recording equipment is your microphone. Choosing the right podcast microphone differentiates a professional show from an amateur one. You can choose between a standard XLR microphone or go straight from your mic to a computer with a USB microphone. There are dozens of great microphones out there, but a select few have become the favorite choice of podcasters worldwide.
Let’s clarify what makes a good microphone first.
Since you’re planning to start your own podcast, you should go for a unidirectional microphone instead of an omnidirectional one. So, what’s a unidirectional mic? As the name suggests, it’s a microphone that picks up sounds only from one direction, removing most of the background noise and ensuring the quality you’ll need for your show.
Dynamic microphones are the most common type and feature the design we’re all familiar with: they’re used in conventions, live events and recording studios. They’re incredibly versatile and are ideal for noisy environments as they enhance the loudest sounds they capture.
Condenser microphones are probably a better choice if your only purpose is to record a podcast. They’re ideal for voice recording in a quiet environment because they are more sensitive than the condenser mics and capture all subtleties in a voice.
Another factor to consider is whether you should go for a USB or XLR microphone. While you can connect a USB microphone directly to your PC, with the XLR mic you’ll need an audio interface to connect them. USB microphones are generally cheaper and can do an excellent job at recording your voice, but their XLR counterparts produce better audio quality.

The Blue Yeti has been the favorite choice of online broadcasters for many years. It provides the consistency and high-fidelity you’ll need when recording your show. In addition, the Blue Yeti is a USB microphone, which means you can simply plug it in and start recording in no time.
If you’re willing to spend a bit over $100 on a microphone, then the Blue Yeti is the right choice for you and your show.

Another fantastic option for beginner podcasters who want great audio quality from day-1 is the Audio-Technica ATR2100x. What’s interesting about this microphone is that it has both USB and XLR entries. Allowing you to use either depending on your podcast equipment and needs.
Another exciting feature is the cardioid polar pattern. This ensures the microphone picks up sounds only from the most relevant sound sources and neglects the rest.
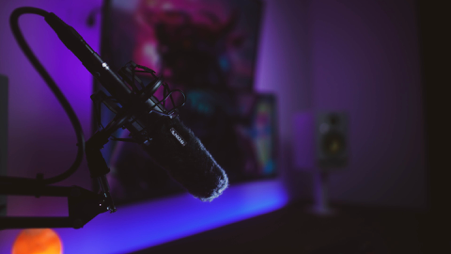
Never underestimate your comfort while recording a radio show. Your posture and the quality of your microphone stand can upgrade the overall quality of your podcast. While it might not seem like the most important podcast equipment, the best mic stands absorb vibrations and keep the microphone at the optimal height. Allowing you to be comfortable and record your podcast audio without issue.

Microphone Stand for Blue Yeti
It works with Blue Yeti, as well as with other dozens of microphones. You can connect this type of stand directly to your desk with the mic clip holder provided. This is a great solution to reduce vibrations that would interfere with the recordings. This kind of desk mic stand is ideal. Tthey offer versatility and comfort in any environment. You can adjust the height and distance in seconds without bending or stretching to reach optimal quality.

BILIONE Upgraded Desktop Microphone Stand
Are you looking for a stand that will optimize space and offer the stability you need? Then BILIONE is an excellent choice. Things couldn’t be easier with this mic stand: you just place the microphone in front of you and start recording. It doesn’t occupy much space, but it’s sturdy and offers a reliable adjustable shock mount that prevents vibrations.
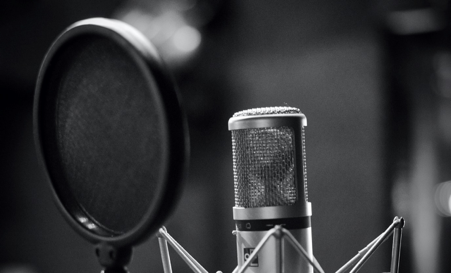
Pop filters are another piece of podcast equipment that’s often ignored by new podcast content producers but an absolutely necessary piece of your podcasting setup if you’re interested in studio-quality audio.
Sounds such as “P” and “B” are called plosives. They result in an overloading of the microphones’ diaphragm. Which results in a “pop” in the microphone signal. A pop filter minimizes plosives like Ps and Bs. It keeps moisture off the microphone, letting your microphone properly record audio in the way it’s intended.

Auphonix Pop Filter Screen
An affordable choice that will provide everything you need for your show is a pop filter screen. When you choose one, make sure they have an adaptable gooseneck that will adjust to your workspace. They can be attached directly to the mic stand or your desk.

CODN Recording Microphone Isolation Shield
A bulkier solution but one that will make you look and sound very professional. The isolation shield is basically a pop filter and a tiny recording studio that you can carry around and use in any environment.
What makes the isolation shield an optimal solution for podcasters is that they eliminate noise interference completely. This allows the microphone to capture your voice exclusively. Do you live in a noisy house or neighborhood? Consider buying one of these.
While you can record a radio show using just a single USB microphone, there are many situations when you need two or more microphones or don’t have enough ports to support multiple USB mics. For example, if you’re recording an interview with guests, you’ll need an audio interface with more than one audio input to connect multiple microphones to your laptop. Unlike USB mics, an audio interface can record multiple microphones with just one USB port.
You won’t need any fancy audio equipment for your podcast, but if you want to sound professional when recording audio, investing in a good interface will go a long way. Be aware that you’ll need to have XLR microphones to use most audio interfaces. Note, you’ll also need to invest in cables, as XLR mics use XLR audio cords. You also might want multiple headphone outputs so that each of your interview guests can have their own headphone amplifier and headphone jack.
But audio interfaces are not only ideal when you want to use more than one microphone at once. They allow you more control over the volume of each microphone individually, making it easier to reach optimal sound quality for your show.
Given that all interfaces these days provide XLR entries, you’ll also have the chance to use both USB and XLR connections and see if one works better than the other. Each combination of microphone, audio interface, and environment gives different results. it’s always good to have more options at your disposal.
Learn more about What is an Audio Interface in our article.
The negative aspect of using an audio interface is that you’ll have to learn how to use it. If you’re used to electronic devices doing everything independently without your intervention, then audio interfaces might be a bit of a challenge for you. However, once you get a general idea of how it works, you’ll be able to considerably enhance the sound of your recordings.

Focusrite Scarlett 2i2
You can put your faith in a Focusrite audio interface. Focusrite has produced amazing audio interfaces that are way more affordable than its competitors; as a result, their Scarlett series is now considered a must-have by music-makers worldwide.
The Focusrite Scarlett 2i2 offers everything a podcaster needs: it’s affordable, easy to set up and use. As long as your computer has an open USB output you can record up to two microphones at once without delays or interferences.

Behringer UMC204HD
Another outstanding product for the price. The Behringer UMC204HD offers two microphones’ inputs and is compatible with all the most popular recording software. Behringer is a historical brand that won’t disappoint you.
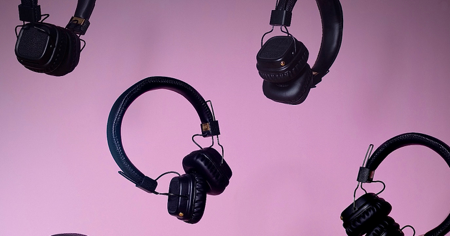
Good headphones help you “scrutinize” your show. It’s easy to miss unwanted background noise or sounds when using affordable headphones or earphones to double-check your recordings. However, bear in mind that more and more people own good-quality headphones and sound systems, be it in their home or car.
So, before you publish your show, you need to make sure it’ll sound pristine on all devices. For this task, you must have headphones in your podcasting kit that reproduce sound clearly, without enhancing or sacrificing some audio frequencies.

Sony MDR7506
Here we’re talking about headphones that made history. First released in 1991, the Sony MDR7506 has been used by audio engineers, audiophiles, and musicians worldwide. These headphones provide a transparent sound reproduction, are comfortable even after hours of use, and look really cool.

Fostex T20RP MK3
Slightly more expensive than the Sony MDR7506, the Fostex T20RP MK3 offer richer bass frequencies than their Sony counterpart. This might interest you if you’re planning to start a podcast about music. Apart from that, both headphones offer incredible fidelity and comfort.
Parallel to the increasing popularity of the format, there’s been a plethora of new audio editing software for podcasters coming out over the last decade. This means you’ll get to choose between dozens of programs that offer a different mix of features and prices.
I can tell you it’s quite unlikely you’ll stick with the first editing software you’ll try, but it’s also important you start from somewhere and then look around to see what other audio software offers precisely what you need in the long term.
If you’re tech-savvy, then there are a few options for recording software and podcast editing for free. On the other hand, if you have no technical knowledge and don’t want to spend hours learning the skills to get your sound right. There are plenty of podcast software that will do most of the dirty work for you, allowing you to focus exclusively on the curation of your show.
If you’re interviewing people remotely, recording on Zoom is probably the easiest option.
Setting up your new microphone or audio interface is a no-brainer on Zoom. Always make sure your internet connection is stable, and you’re recording in a quiet environment. On Zoom’s settings, you’ll have to select the right microphone and audio interface before you start the interview. Otherwise, you’ll end up recording everything through your PC’s microphone, and it will sound terrible.
I suggest to people who use Zoom for remote interviews to ask their podcast guests to record the interview on their end. In this way, you’ll get an additional audio file you can use as a backup; furthermore, the guest’s file will have a much clearer sound of their voice than the one you have.
Another thing you’ll need to ask your guests is to use earphones or headphones for the duration of the recording session. This helps avoid delay effects and reverberations typical of online meetings.
Below is a list of the most common post-production and recording software used by podcasters. Often the main difference between them lies in their AI’s ability to do most of the work for you. Some options will take care of everything. Others will simply record your show and let you do the rest. These are all valid options. It’ll be up to you to select one that’s right for your skills and needs.

There are a few good recording programs out there (like Adobe Audition, Logic, and ProTools), but to me, Audacity has a feature that makes it unbeatable: it’s free. Audacity is a fantastic tool to edit and improve the quality of your audio. It’s versatile, easy to use, and offers many post-production features that are generally quite expensive.
Audacity offers plenty of tools to improve your sound quality, from noise reduction to compression; however, once you start getting to know more about audio editing, you’ll realize that learning how to use these tools proficiently takes time. I suggest you take it one step at a time. After all, if you already have a good mic and are recording in a quiet environment, you probably won’t need to do much editing on Audacity.
I came across Descript because an artist I work with uses it regularly for her podcast. Descript has fantastic features, like its highly reliable transcription software. What stands out when using it is how easy it is to just produce a popular podcast and edit it in seconds, thanks to an AI clone of your voice that can add and replace words in the original audio.
There are a couple of things that make Alitu an excellent choice for podcasters. The first one is its well-known automated audio clean-up and leveling. Meaning you don’t have to worry about perfecting your sounds and can focus on content. The second interesting feature is that Alitu also takes care of publishing your podcast on all relevant podcast directories.
Designed for podcasters and journalists, Hindenburg Pro offers an easy-to-use multitrack recorder that you can also use on the go with the Hindenburg Field Recorder app. The software also provides plenty of options to share audio material online, both publicly and privately.
If your interest in audio goes beyond podcasting, I suggest you check out Hindenburg’s vast catalog. They offer plenty of exciting products for audio narrators, musicians, and more.
The Spotify-owned Anchor offers a valid subscription program that allows you to monetize your show directly from your fans. Furthermore, you can collaborate with brands worldwide, include their ads in your podcast, and make some money out of it.
The AI featured in Auphonic is probably one of the best in the market. You can achieve high-quality results without spending hours fixing raw audio material in post-production. It carefully filters out unwanted frequencies and hums. When you’re done, it’ll automatically share your show online. If you don’t have experience in audio editing, this may be a valid option for you.
Why not? For mac users, GarageBand offers everything you need to record a show without spending a dime. When used wisely, GarageBand is a free versatile multitrack recorder you can use to record your shows easily. I think it’s a great option if you’re on a budget. Be aware that GarageBand was made with musicians in mind, not podcasters. This means you won’t find any fancy algorithm doing the job for you here.
In the end, it all comes down to the microphone you’re using and the environment you’re recording in. Having the best podcast equipment, the perfect voice, interesting topics, and guests won’t matter if you have a noisy chair that compromises the quality of your show.
It’s challenging to “find” a recording location; however, a recording space can be “created”. The environment you’ll use to record your show will be your temple. A place where you can concentrate and relax for hours. Creating such a space in your home or office is no easy task but can be accomplished if you focus on the most critical factors.
A quiet environment is paramount. I know it sounds obvious, but a noisy environment is the one thing that can ruin even the best podcast. If you don’t have access to a recording studio, podcast studio, or dedicated studio, you’ll need to find a quiet room in your house for all your podcasting equipment.
If you’re recording at home, here are a few tips you can use to optimize your audio recordings:
Why the closet? The ideal recording room is quiet and with little reverberation. A softly furnished room would provide the best environment for the interview as the furniture will absorb the reverberation. In addition, the clothes in the closet will absorb the echo (much like acoustic treatment and acoustic panels) and guarantee insulation and good sound.
Conversely, you should avoid glass offices or empty rooms because the reverberation will increase dramatically.
It’s essential you find a room where you feel relaxed and comfortable. I listened to radio shows that simply ignored most of the basic rules necessary to get a good-quality sound. Yet they’ve been able to achieve considerable success because of a charismatic host and a carefully curated program. After defining your show thoroughly, creating the perfect environment for your recording session is the second crucial step towards success.
Once you have recorded your first podcast episode, it’s time to publish it and let the world know about it.
In order to do that, you’ll need to look for a podcast distributor that will take care of uploading your show on all relevant podcast hosting platforms. Podcast distributors work like this: you upload your podcast on their podcast directories, with all the necessary information like description and tags, and they will automatically upload it on all audio streaming and podcast hosting services they’re partnering with.
Before choosing a distributor, take a look at the list of streaming services where they upload content. This is especially true if they’re more economical than the others, as it may be because they’re not partnering with one of the mainstream providers (like apple podcasts).
For many years, I’ve used Buzzsprout to publish all my radio shows. It’s affordable, intuitive, and its list of podcast hosting partners is growing steadily. However, Podbean is an excellent alternative that also offers a more convenient free option.
Buzzsprout is easy to use and offers extensive stats, so you can monitor your radio show as it grows. You can upload your episode in any audio format. Buzzsprout will ensure the streaming services receive the correct audio file.
Monthly, you can upload up to 2 hours for free, but episodes are hosted only for 90 days. If you want your show to stay online for longer, you’ll need to opt for a subscription.
Podbean has a better free service option than Buzzsprout, as it allows up to 5 hours of uploads monthly. Apart from that, I think these two services offer very similar features.
How about you start two shows at once and use both distribution services and make a comparison?
The success of a podcast starts with a defined idea. The concept for your radio show becomes the foundation of a project that may change your business or career forever.
There’s no doubt that recording equipment will be a crucial aspect of your project. However, even the most expensive microphone and audio interface won’t save your show if you don’t clearly understand what you want to achieve with it. Therefore, planning long-term is the single, most important aspect of your strategy.
When you clearly understand what you want to achieve with your show. It’s time to focus on the tools and podcast equipment you’ll need to make it happen.
Choosing the software you’ll use to record your podcast is a fundamental step. If you’re already familiar with audio editing, you can opt for free software like Audacity and edit the audio yourself. However, if you want to focus on content and worry as little as possible about the audio, then choosing a subscription service with optimized AI and algorithms will save you plenty of time and energy.
You can save a lot of money on most of your podcast equipment, but don’t go for a cheap option for microphones. especially since there are plenty of mics that provide professional quality without breaking the bank. They’re not cheap, mind you: nonetheless, a good microphone will define the quality of your show, so don’t underestimate it.
Finally, you’ll need a quiet environment. Good sound aside, you’ll need a room where you feel comfortable, creative, and inspired more than you’ll need a professional podcast studio. Your recording should represent who you are and who you want to be, encouraging you to push yourself beyond your limits and improve your show over time. What I’m trying to say is that if your recording room will look and feel professional, most likely you’ll sound professional while recording your show.
Success won’t happen overnight. It may take three shows or even three seasons before you start seeing the engagement you were aiming at when you started. If your podcast’s audience is growing slowly but steadily, and you’re trying to improve the quality of your show, then consistency and persistence will bring incredible results. Good luck!


